AI

Join 500+ brands growing with Passionfruit!
Have you ever wanted to make a computer do smart things automatically, like summarize text or answer questions, but felt lost with complex code?
This guide is for you!
We'll show you how to build your very first AI workflow using n8n, a fantastic automation platform, in just about 10 minutes. No coding needed for this start, just simple clicks and clear instructions.
Let's get your AI automation journey started!
What is an AI Workflow? Understanding AI Automation Basics
Before we build, let's quickly understand what an AI workflow means. Imagine a simple chain of actions:
Something happens (like you getting a new piece of text).
An Artificial Intelligence (AI) tool then does something smart with that text (like summarizing it).
Based on what the AI did, something else happens automatically (like sending the summary to you).
This entire automated chain, from start to finish, is an AI workflow. We're making computers work smarter, for you, automatically!
Getting Started with n8n: Your Workflow Automation Platform
To build your first AI workflow, you need n8n. Think of n8n as a digital whiteboard where you connect different pieces of software and AI tools together. It's a no-code automation tool that makes building AI automations visual and easy.
Choose Your n8n Setup: Cloud or Self-Hosted n8n
For this 10-minute AI workflow guide, the easiest way to start is with n8n Cloud. This means n8n handles all the technical setup for you.
n8n Cloud: Simply sign up at
n8n.io/cloud. You'll get instant access to your n8n workspace. This is the fastest way to build AI workflows without any installation.Self-Hosted n8n: If you're more technically inclined, you can also install n8n on your own computer or server using Docker. For this quick guide, n8n Cloud is recommended.
Once you have access to your n8n workspace, you're ready for the next step.
Secure Your AI Access: Setting Up AI Credentials (OpenAI Example)
To let n8n talk to an AI tool like OpenAI (which powers ChatGPT), you need a special key. Think of this key as a password that proves you have permission to use the AI service. In n8n, these are called credentials.

How to Get Your OpenAI API Key
Go to
platform.openai.com.Log in or create an account.
Look for "API keys" (usually under your profile or settings).
Click "Create new secret key."
Important: Copy this key immediately! OpenAI shows it only once. If you lose it, you'll need a new one.
Add Your OpenAI Credential in n8n
In your n8n workspace, look at the left sidebar. Find "Credentials" (it often looks like a key icon). Click it.
Click the "+ Create New Credential" button.
In the search box, type "OpenAI" and select it.
A small form will appear. Paste the OpenAI API key you just copied into the field labeled "API Key."
Give your credential a simple name, like "My OpenAI Key."
Click "Save." n8n will securely store this key. Now, n8n can securely use OpenAI for your AI workflows!
To start n8n, create a free account at n8n.io/cloud, your workflow canvas loads in under two minutes, no installation required. Once inside, you will see a blank canvas where you drag nodes onto the screen and connect them to build automations. For this guide, you will use a Chat Trigger node and an AI Agent node: the two building blocks behind every n8n AI workflow in 2026. If you prefer full data control, n8n also runs as a self-hosted Docker container, but n8n Cloud is the fastest way to build your first AI workflow.
What follows walks through the full setup: choosing between n8n Cloud and self-hosted, getting your OpenAI API key, building the Chat Trigger → AI Agent → OpenAI pattern step by step, activating the workflow, and fixing the three errors most beginners hit. Total time: about 10 minutes if you have an OpenAI account ready, 15 minutes if you don't.
n8n Cloud versus self-hosted: which one to pick
n8n Cloud and self-hosted n8n run the same software with different operational tradeoffs. n8n Cloud is the hosted version: zero setup, automatic updates, and a free tier sufficient for the first workflow. Self-hosted n8n runs as a Docker container on your own server or local machine: full data control, no per-execution limits, but requires command-line comfort and ongoing maintenance.
For a first AI workflow, n8n Cloud is the recommended path. The signup flow takes under two minutes, the canvas loads with sample workflows pre-installed, and the free tier covers far more executions than you will use during early experimentation. Self-hosted becomes worth the setup time once you have a workflow handling sensitive data, hitting execution limits on the cloud tier, or needing specific integrations only available in the community edition.
For the rest of this guide, the screenshots and steps assume n8n Cloud. The interface is identical on self-hosted n8n, so every step works the same way if you have already deployed the Docker container.
Step 1: Create your n8n Cloud account
Go to n8n.io/cloud and click the signup button. You will be asked for an email address, a password, and a workspace name (this becomes the subdomain of your n8n URL). The signup confirmation email arrives within a minute, and clicking the verification link takes you straight to a blank canvas.
The first time you land on the canvas, n8n shows a welcome panel with three sample workflows. Close the panel and you will see an empty grid with a single button that says "Add first step". The blank canvas is where you start.
Step 2: Get your OpenAI API key
The AI Agent node in n8n needs credentials for the language model it calls. OpenAI is the most common choice for beginners because the API is simple, the cost is low for a test workflow, and the n8n integration is the best documented.
Open platform.openai.com in a new tab. Log in or create an account. Click your profile icon in the top right, then API keys. Click "Create new secret key", name the key something memorable like "n8n test", and click Create. The key appears once on the next screen. Copy it immediately, OpenAI does not show the full key again after this. Paste it into a temporary note for the next step.
The key starts with sk- and is about 50 characters long. If you skip copying it now, you will need to delete the key and create a new one.
Step 3: Add your OpenAI credential in n8n
Back in n8n, click the Credentials icon in the left sidebar (it looks like a small key). Click "+ Create New Credential". In the search box, type OpenAI and select OpenAI from the list.
A form appears with a single field labeled API Key. Paste the key you copied. Give the credential a name like "OpenAI test key". Click Save. n8n stores the key encrypted at rest, and the value never appears in clear text in the UI again.
Return to the canvas by clicking Workflows in the sidebar, then create a new workflow with the "+ Workflow" button.
Step 4: Build the Chat Trigger to AI Agent to OpenAI workflow
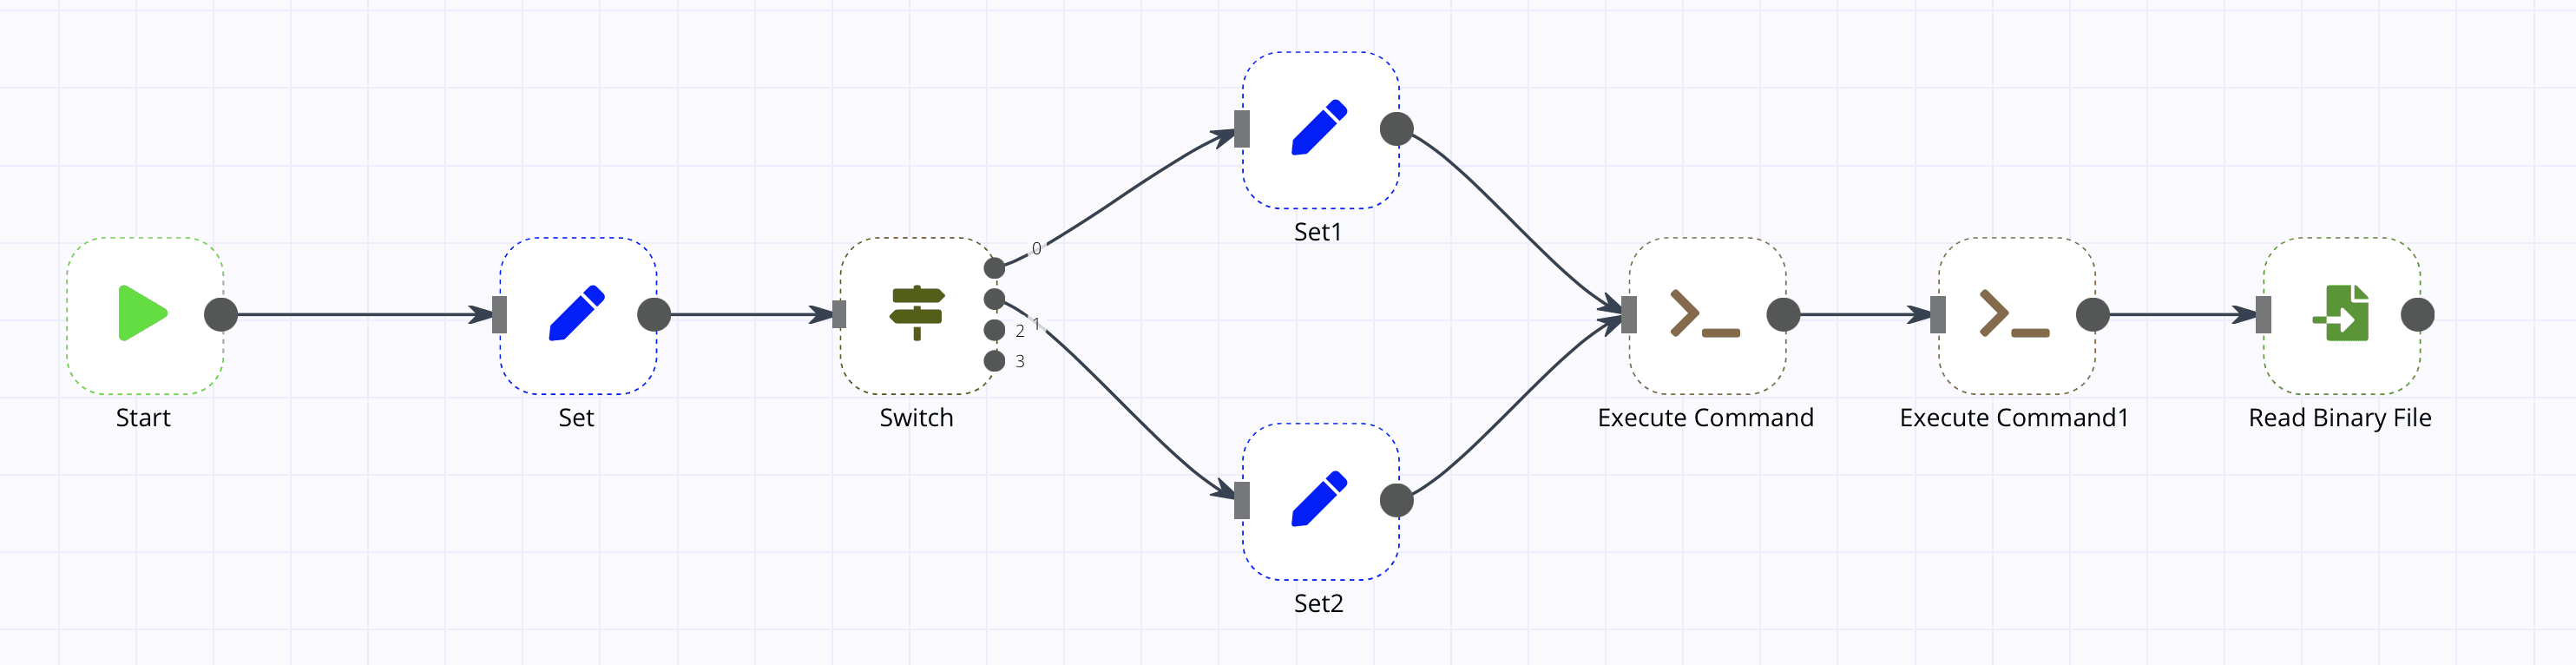
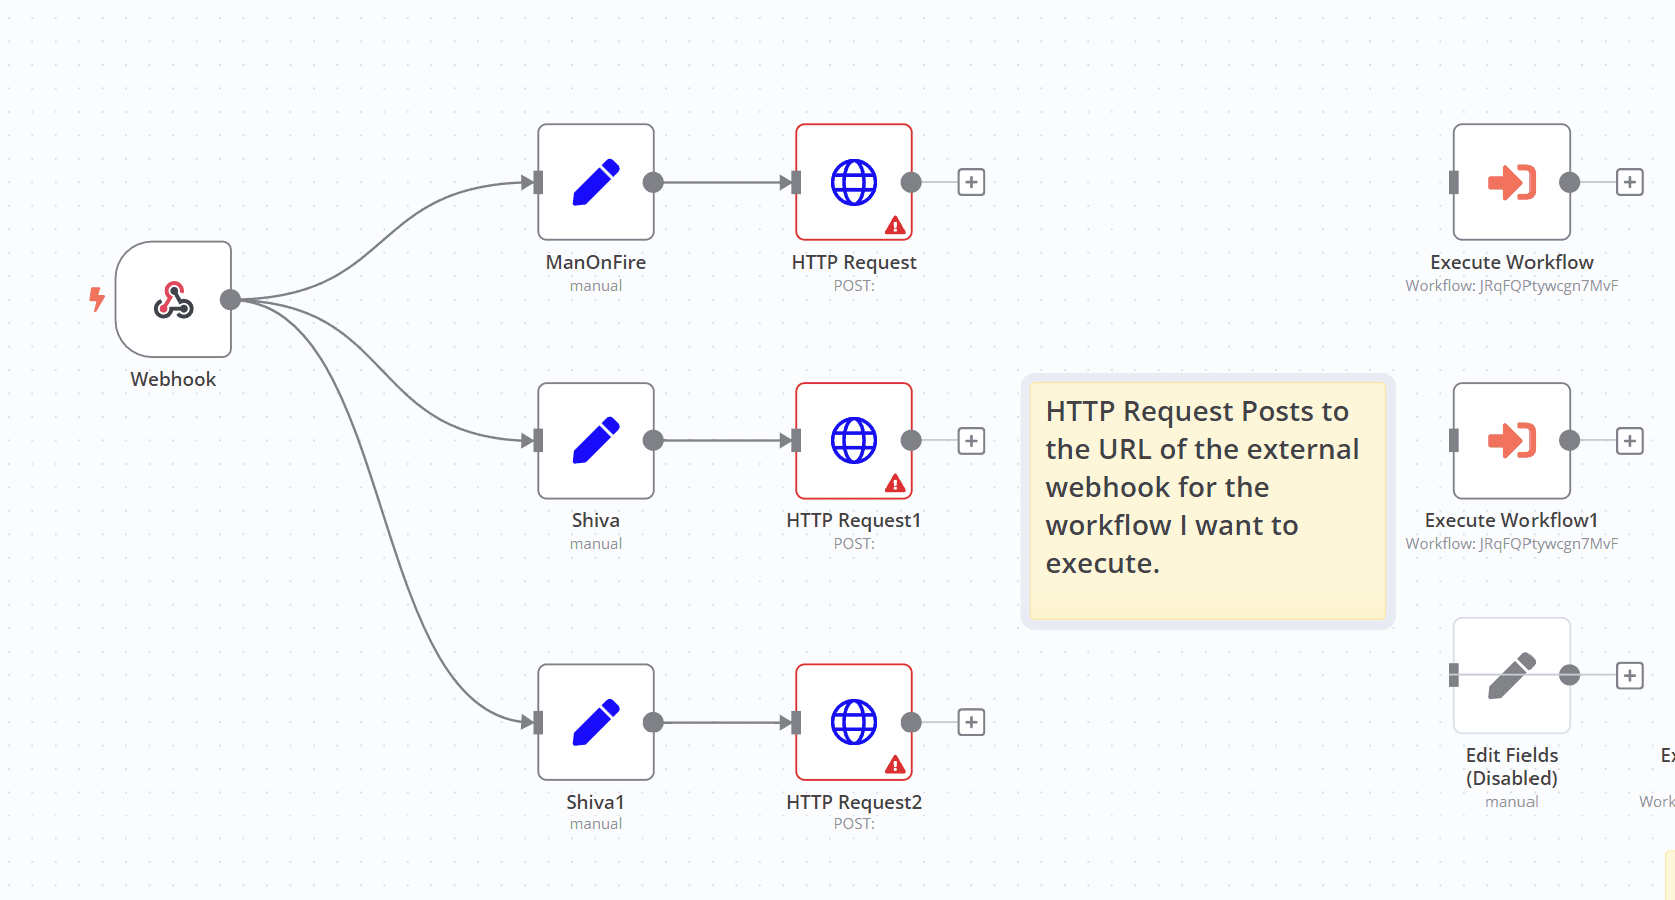
The current n8n pattern for an AI workflow uses three connected nodes: a Chat Trigger that captures user input, an AI Agent that handles the conversation logic, and an OpenAI Chat Model that powers the language understanding. The legacy Start node plus Set node plus OpenAI node pattern many older tutorials show is still functional but no longer the recommended approach. The Chat Trigger + AI Agent pattern matches n8n's official docs at docs.n8n.io/advanced-ai/intro-tutorial and produces a more flexible workflow.
Add the Chat Trigger node
Click "Add first step" on the empty canvas. In the search panel, type Chat. Select "On chat message" under the Chat Trigger node. The node lands on the canvas. Click it to open the settings panel on the right. The default settings work for a first workflow: leave Mode as "Hosted Chat", leave Public set to off, and close the panel.
The Chat Trigger gives you a public-style chat window that runs inside n8n itself, so you can test the workflow without exposing it to the web.
Add the AI Agent node
Click the small plus icon to the right of the Chat Trigger node. In the search panel, type AI Agent. Select "AI Agent" from the list. The node lands and connects automatically.
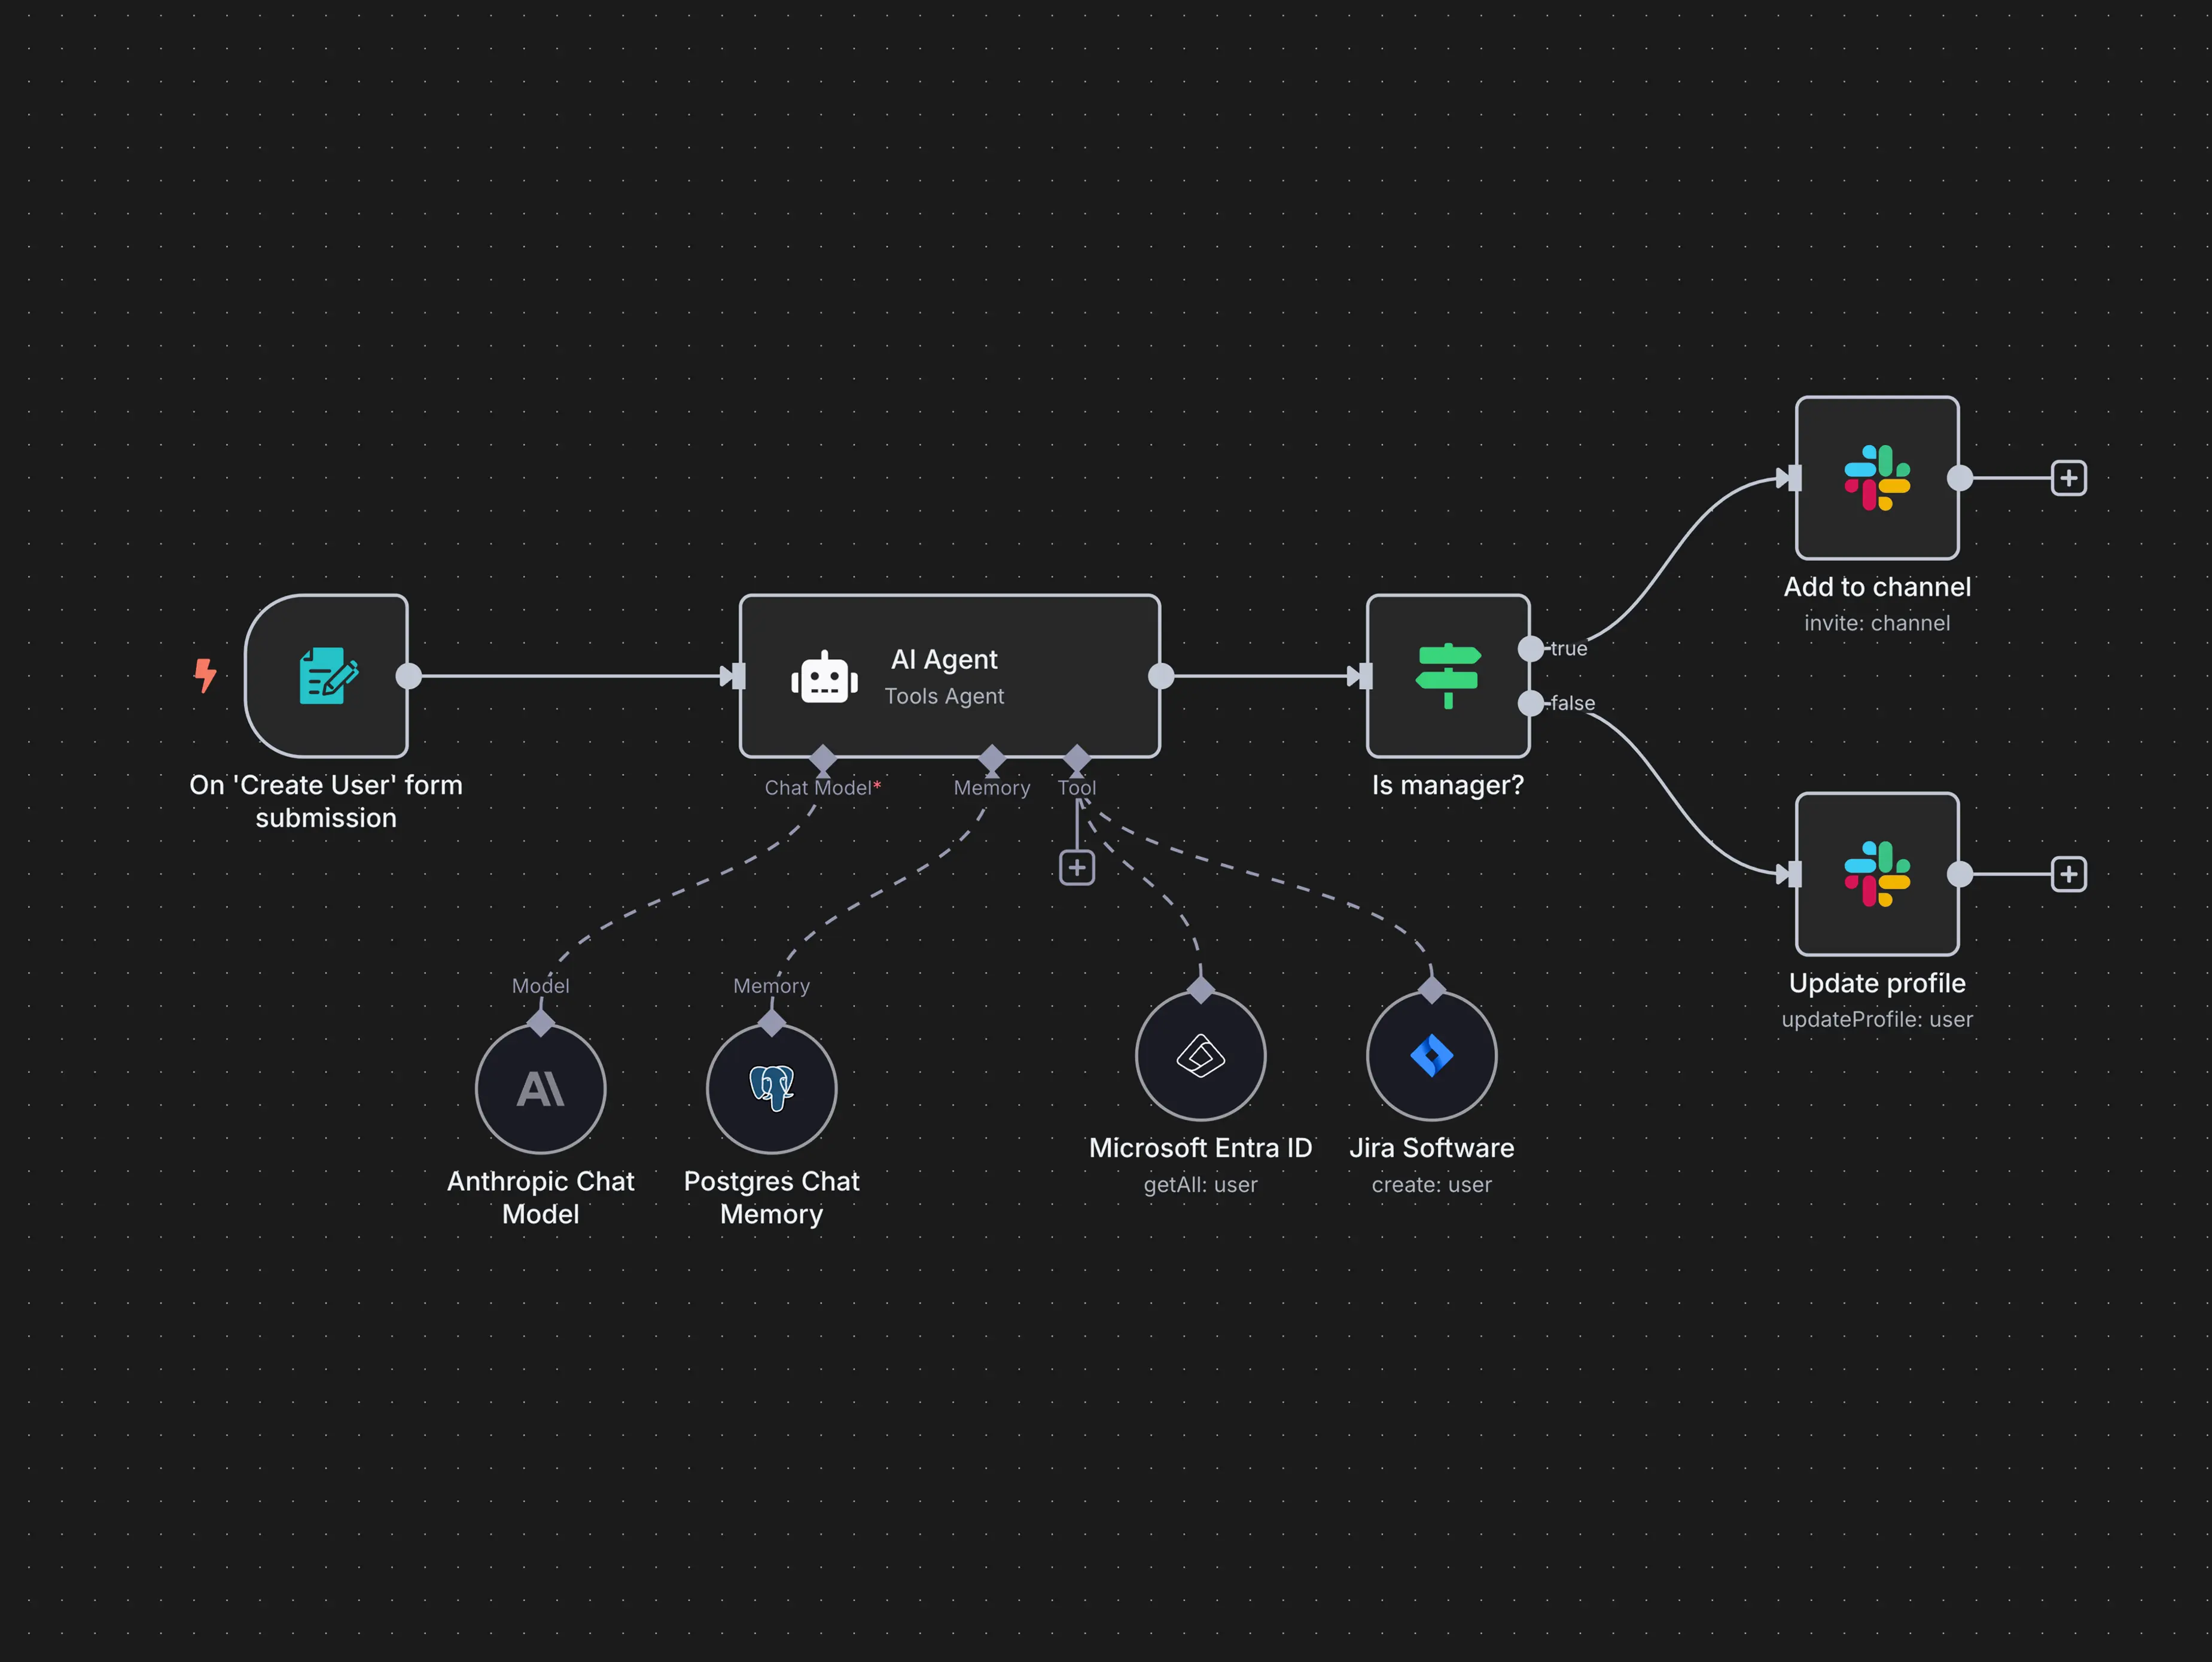
Click the AI Agent node. The settings panel shows three sub-node slots: Chat Model, Memory (optional), and Tool (optional). The Chat Model slot is the only one required for a basic workflow. Click the small plus icon beneath the Chat Model slot.
Connect the OpenAI Chat Model sub-node
In the sub-node search panel, type OpenAI. Select "OpenAI Chat Model". The sub-node connects beneath the AI Agent. Click it to open the settings.
Under Credential, select the OpenAI credential you created in step 3. Under Model, select a current model. As of May 2026, gpt-4o-mini is the most cost-efficient choice for first workflows, with gpt-4o available when you need stronger reasoning. Close the sub-node panel.
The canvas now shows three nodes wired together: Chat Trigger → AI Agent, with OpenAI Chat Model attached underneath the AI Agent.
Test the workflow
In the bottom-left corner of the canvas, click the "Open chat" button. A chat window pops up. Type a message like "Summarize the benefits of workflow automation in three bullet points" and press Enter.
The workflow runs end to end: the Chat Trigger captures your message, hands it to the AI Agent, which sends it through the OpenAI Chat Model and returns the response in the chat window. The whole flow takes about two seconds for a short message. Each node on the canvas lights up green as the message passes through.
How to activate a workflow in n8n
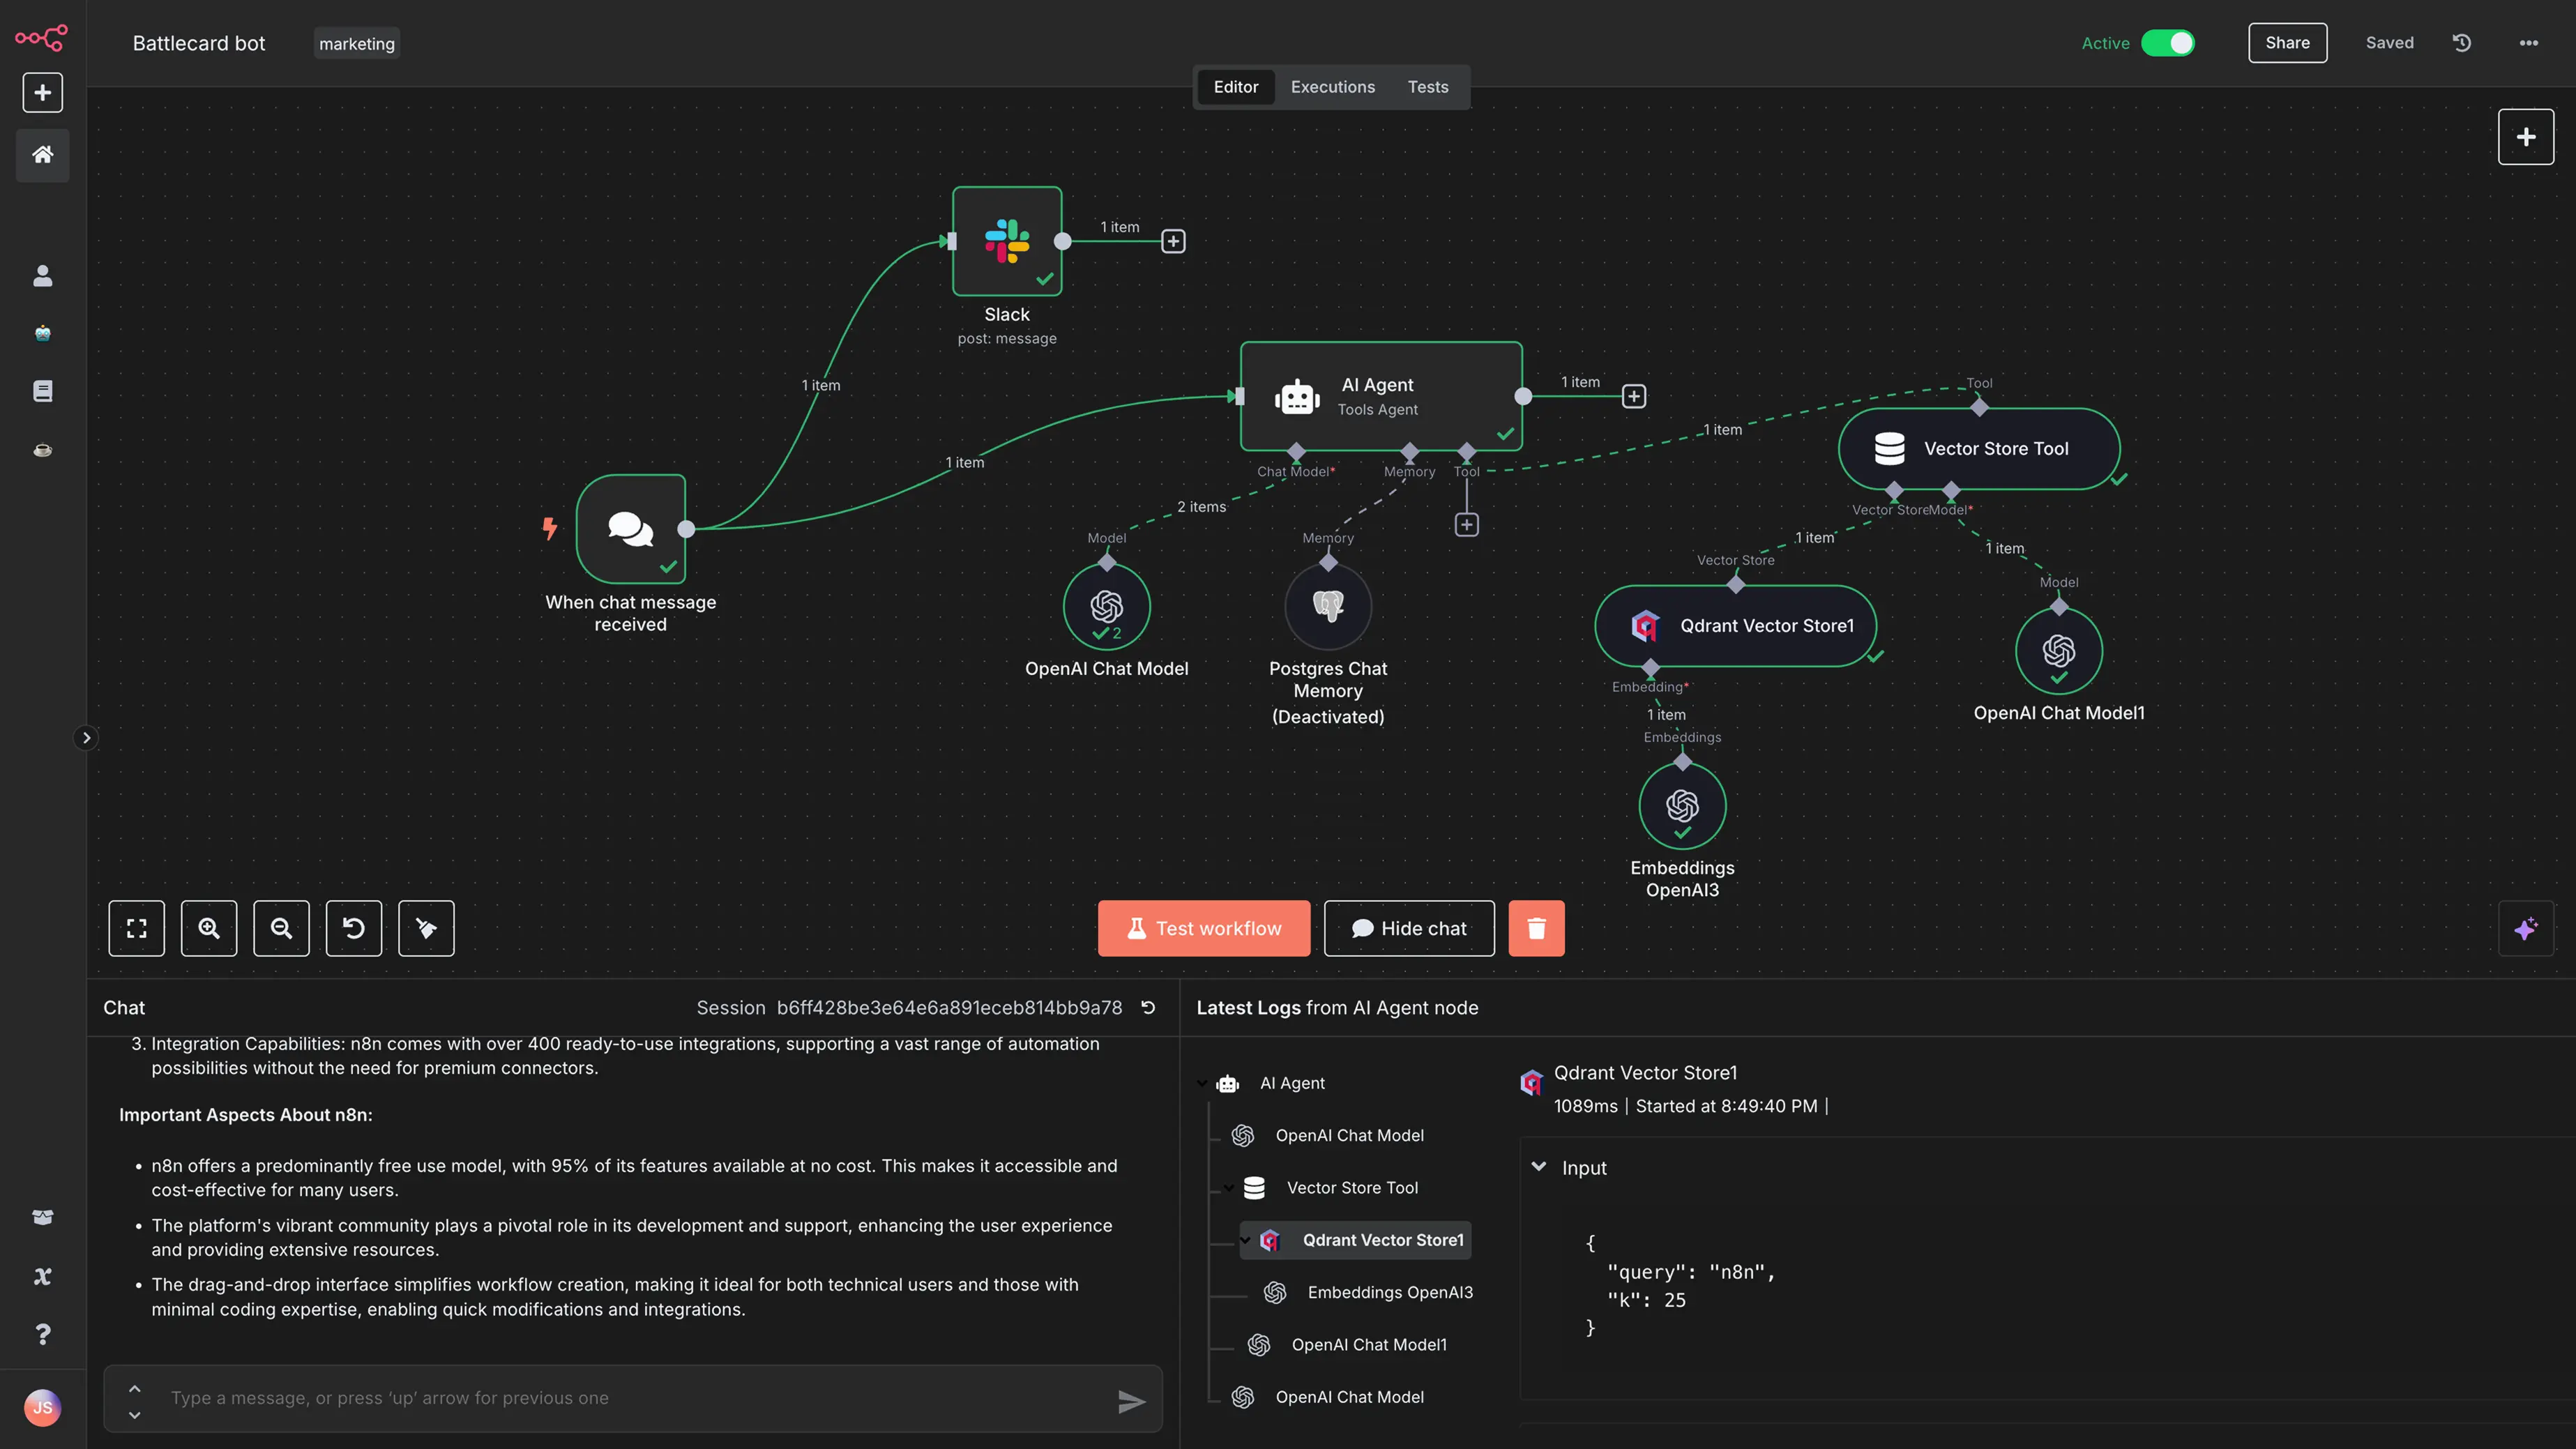
To activate a workflow, click the Active toggle in the top right of the canvas. The toggle turns green, and the workflow runs on its own according to the trigger schedule (or every time the chat receives a message, in this case). An inactive workflow only runs when you manually test it from the canvas, so workflows you want running in production must be activated.
The toggle is reversible. Switching it off pauses execution without deleting any workflow data. You can edit the workflow while it is active, but changes do not apply to in-flight executions until you click Save.
Common errors and how to fix them
Three errors hit most beginners. Each has a clear fix.
The first is an Invalid API key error from the OpenAI Chat Model sub-node. The fix is almost always that the key was copied with a leading or trailing space, or the wrong key was pasted. Delete the credential in n8n and recreate it, pasting carefully. If the key is correct but the error persists, check that the OpenAI account has billing enabled, free OpenAI accounts run out of credit fast.
The second is a Workflow could not be started error. The fix is to confirm the Chat Trigger and AI Agent are connected by a visible line on the canvas. If you accidentally moved a node and broke the connection, click the small dot on the right side of the Chat Trigger and drag a line to the left side of the AI Agent.
The third is a workflow that runs but returns nothing in the chat window. The fix is usually that the OpenAI Chat Model sub-node lost its credential link during canvas reorganization. Click the sub-node, confirm the credential dropdown shows your OpenAI key, and re-save.
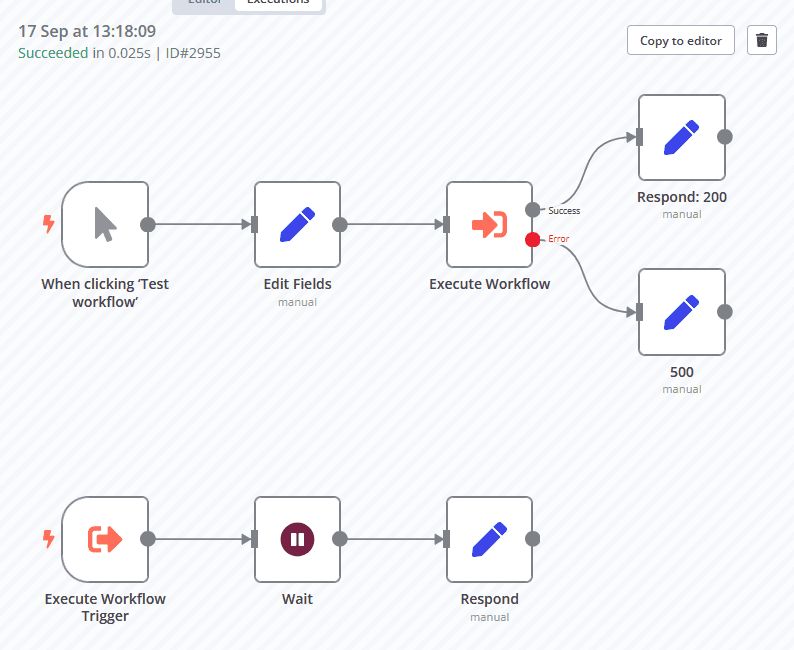
For deeper debugging, n8n stores every execution in the Executions tab in the left sidebar. Click any past execution to see the exact input and output at each node, including any error messages the OpenAI API returned.
Build Your First AI Workflow: Text Summarization Automation
Our goal for this first AI workflow is simple: we'll give n8n some text, it will send that text to OpenAI for summarization, and then show you the summary. This is a core AI automation basic.
Step 1: Start Your AI Workflow - The Start Node
Every n8n workflow begins with a "trigger" – something that tells the workflow to start. For our first AI workflow, we'll use a simple "Start" node.
In your n8n workspace, you'll see a blank canvas.
Find the
Startnode (it's usually there by default, or you can search for "Start" and drag it onto the canvas).This
Startnode is your workflow trigger.
Step 2: Provide Input Text - The Set Node
We need to give our AI workflow the text we want summarized. We'll use a "Set" node for this.
Click the
+button next to theStartnode on the canvas.In the search box that appears, type "Set" and select the
Setnode. Connect it to theStartnode.Click on the
Setnode to open its settings on the right side.Under "Values," click "Add Value."
For "Value Name," type
textToSummarize.For "Value," paste a short paragraph of text you want to summarize. For example:
"Artificial intelligence (AI) is intelligence—perceivable by humans—exhibited by machines or software. It is also the study of the field of inquiry that studies the behavior of, and designs, such intelligent agents. AI research is highly technical and specialized, deeply divided into sub-fields that often fail to communicate with each other."
This
Setnode now holds the text your AI will process.

Step 3: Connect to AI - The OpenAI Node
This is where the AI magic happens! We'll use the OpenAI node to send our text for summarization.
Click the
+button next to yourSetnode.Search for "OpenAI" and select the
OpenAInode. Connect it to theSetnode.Click on the
OpenAInode to open its settings.Under "Credentials," select "My OpenAI Key" (or whatever you named your credential). This tells n8n how to securely talk to OpenAI.
Under "Resource," choose
Chat.Under "Model," select
gpt-3.5-turbo. This is a common AI model from OpenAI.Now, the most important part: the AI instructions (called "messages" or "prompts"). Click "Add Message" twice:
Message 1:
"Role":
system"Content":
You are a helpful assistant that summarizes text concisely.(This tells the AIits job.)
Message 2:
"Role":
user"Content":
Please summarize the following text: {{ $node["Set"].json.textToSummarize }}Understanding
{{ }}: This special{{ }}is an "expression." It tells n8n to take the content from ourtextToSummarizevalue (which we set in the previousSetnode) and put it right here into the AI's prompt. This is how n8n makes your AI workflows dynamic.
Step 4: See the Summary - The Respond to Webhook Node
To see the result of our AI workflow immediately, we'll use a "Respond to Webhook" node. This will show the summary in your web browser.
Click the
+button next to yourOpenAInode.Search for "Respond to Webhook" and select it. Connect it to the
OpenAInode.Click on the
Respond to Webhooknode.Under "Body," click "Add Expression."
You need to tell n8n exactly where the summary is in the OpenAI node's output. Select
{{ $node["OpenAI"].json.choices[0].message.content }}. This expression points directly to the summarized text generated by the AI model.
Run Your First AI Workflow! Automate with AI Now!
You've built your first AI workflow! Now, let's run it.
Save Your Workflow: Click the "Save" button in the top right corner of your n8n workspace. Give it a name like "My First AI Summarizer."
Activate Your Workflow: Click the "Active" toggle switch in the top right corner, next to the "Save" button. This makes your workflow ready to run.
Copy the Webhook URL: Click on the
Webhooknode (our very first node). In its settings on the right, you'll see a "Webhook URL." Click the "Copy" button next to it.Trigger Your Workflow: Open a new tab in your web browser. Paste the copied "Webhook URL" into the address bar.
Press Enter!
What you should see:
In your web browser, after a moment, you should see the AI-generated summary of the text you provided.
In your n8n workspace, you'll see the nodes light up as the workflow executes, showing the data flowing through each step. You can even click on the nodes after execution to inspect the exact input and output at each stage – a great way to understand workflow automation.
Congratulations! You've successfully built and run your first AI workflow with n8n. You've mastered the basics of AI automation, connected to an AI model, and automated a smart task. This simple setup is the foundation for much more complex and powerful AI automations you can build with n8n.
FAQs
How do I start n8n?
To start n8n, create a free account at n8n.io/cloud. Your workflow canvas loads in under two minutes with no installation required. If you prefer full data control, n8n also runs as a self-hosted Docker container, but n8n Cloud is the fastest path for a first AI workflow.
What's the difference between n8n Cloud and self-hosted n8n?
n8n Cloud is the hosted version: zero setup, automatic updates, and a free tier sufficient for early experimentation. Self-hosted n8n runs as a Docker container on your own server: full data control and no per-execution limits, but requires command-line comfort and ongoing maintenance. Cloud is the right pick for beginners. Self-hosted is the right pick once you have a workflow handling sensitive data or hitting cloud execution limits.
What is the Chat Trigger node in n8n?
The Chat Trigger node captures user messages as the starting point of an AI workflow. The node creates a chat window inside n8n where you can test conversational workflows without exposing them to the web. Chat Trigger replaced the legacy Start node as the default entry point for AI workflows in n8n's 2025 UI update.
What is the AI Agent node in n8n?
The AI Agent node is n8n's wrapper around language model calls. The node handles the conversation logic, accepts a Chat Model sub-node (such as OpenAI), and optionally accepts Memory and Tool sub-nodes for more advanced workflows. The AI Agent replaced the direct OpenAI node pattern as the recommended way to build AI workflows.
How do I activate a workflow in n8n?
Click the Active toggle in the top right of the canvas. The toggle turns green and the workflow runs on its own according to the trigger schedule. An inactive workflow only runs when you manually test it from the canvas, so workflows you want running in production must be activated.
Which OpenAI model should I use in n8n?
For first workflows, gpt-4o-mini is the most cost-efficient choice. The model handles summarization, extraction, and basic reasoning at a fraction of the cost of larger models. For workflows that need stronger reasoning (multi-step plans, complex extraction, code generation), upgrade to gpt-4o. Avoid gpt-3.5-turbo for new workflows in 2026, the model is older and the cost gap to gpt-4o-mini is small.
How long does it take to build a first n8n AI workflow?
About 10 minutes if you already have an OpenAI account with API access set up. About 15 minutes if you need to create an OpenAI account and generate the API key from scratch. The n8n side of the work (signup, credential setup, node connection, test run) takes about 5 minutes once the OpenAI key is in hand.
Is n8n free to use?
n8n Cloud has a free tier that covers far more executions than a beginner will use during early experimentation. Self-hosted n8n is free for personal use under the n8n Sustainable Use License. Production cloud plans start at a modest monthly fee, and self-hosted runs at whatever your server hosting costs, with no per-execution fees.
Want to read more about n8n?
https://community.n8n.io
Passionfruit guides:
Generative Engine Optimisation Guide (GEO) for ChatGPT, Perplexity, Gemini, Claude, Copilot